In the weeks after the race at Infineon, I spoke with other racers about my experience with my tires lack of grip. Lots of speculation. Most people thought it was b/c I had so many heat cycles on them. It was an obvious conclusion - but it was not correct. Testing the tread with a durometer showed that the tires were actually still nice and soft and not hardened from heat cycles.
I kept on exploring and finally figured it out.
At the last race, I had decided to "flip" the tires to even out wear patterns. Flipping the tires refers to dismounting them and remounting them so that the inside tread is now on the outside. This enables you to get a little more life out of the tire and saves money.
Turns out when you "flip" a tire, you need to put at least one session on them. Otherwise the tires do not grip. Major lesson learned....
In retrospect, I'm not sure if this actually saved me any money. It cost me a few $ to flip the tires and the car didn't have any grip, ruining a race weekend.
When "Flipping Tires", plan on doing a session or two on them so that the tread grips again.
Saturday, January 28, 2012
Racing at a new track - SCCA @ Infineon
So the next race was Infineon Raceway in Sonoma, CA. I have only been to this track once before in my street car (RX7). Infineon is known as a technical track. It is more challenging and difficult to learn than Laguna Seca or Thunderhill. There are many and frequent elevation changes. Most corners are blind (meaning you can't see the apex or exit). It doesn't even really have a straight. This track keeps you busy working the car the whole time.
The scariest thing about this track is that it doesn't have any run-off. If you go off, you are probably going to hit something. I had just finished fixing my car and was not looking forward to breaking anything else...
How to prep for a new track
I wish I could give you pointers on how to do this but I don't know if I have much to go on.
In preparation for this race at a track that I wasn't familiar with, I watched many Spec Miata videos on YouTube and Vimeo to try and understand braking points, turn in points and see if I could learn this line. Viewing the videos, made me feel comfortable. However, once I got out on track, what I had seen in the videos just didn't translate well to what I did on track.
With the large elevation changes at this track and blind apexes, the videos just didn't seem to help me all that much. I felt totally lost out there. Next time, I'm going to try and do a test day before attempting to race a track that I've never been to before.
Let's talk tires for a bit.
This race was at the mid-point of the season and I was still running the original 6/32 shaved Toyo RA1 tires that I had bought at the beginning of the season. They were wearing surprisingly well. The outside edges were showing a bit more wear than the inside of the tires. Some people "flip" tires to get more life out of them. This involves dismounting the tire and remounting with the inside "flipped" so that it now on the outside. Being the frugal person that I am, I decided to do this. I had AIM Tire flip the tires Sat morning of the race weekend.
Racing at a new track
So, new track, learning the lines, trying to re-build confidence after my last race where I damaged my car. Lots of challenges. I just could not get comfortable. I tried following people during practice but my tires didn't seem to have any grip. What could be wrong? The tires felt awesome last race. Could I have used them up suddenly due to all the heat cycles? The tires still had about 2/32nds of tread. Was it just the driver's self confidence? Very un-nerving at a track as challenging as Infineon.... My qualifying times had me last.
The race finally came and I approached feeling very uncomfortable. The car didn't have any grip and I couldn't keep up. Pretty soon, I was getting lapped. Approaching the Esses, I noticed a string of front runners coming up fast. There isn't enough room for a 5 car train to pass in the Esses. What should I do? If I held my line, I was afraid I'd get taken out so I slowed up and pulled off line so the train could get through. Then I drove into the hot pits and called it a day. I'd rather have the car in one piece so I can figure out what was wrong and save it for the next race.
How to Diagnose a Bent Ball Joint
If you ever need to diagnose if you have a bent ball joint, here is a video tutorial. Hope it helps.
Assessing and Fixing the Damaged Front End
If you read my last post, you'll learn that I wrecked the front end of the car in a bad spin at the last SCCA race at Thunderhill in July 2011.
Damage Assessment
I got the car home and got the front up on jackstands and started to assess damage. Here is what I found.


Damage Assessment
I got the car home and got the front up on jackstands and started to assess damage. Here is what I found.
1. Upper control arm bent:

2. Lower Control Arm very slightly bent (forgot to get picture). I probably could have re-used it but it would have affected how much camber could be adjusted.
3. Front Subframe bent badly. Here are a few pics illustrating the damage:
- Subframe Lower Control Arm rear mounting tab bent:

- Subframe Lower Control Arm front mounting tab bent:

4. Front wheel bent:

I had already changed the front subframe once before while building the car b/c the driver side mounting tabs for the steering rack had been bent at one point in the car's life. It isn't that difficult to do but is a bit time consuming and not fun. I decided to tackle the repair myself so I started sourcing parts. "Where to source these parts?" you might be thinking. The answer is craigslist. :-)
Most of the used parts sourced for this car came from craigslist. So I turned there again. It seems like there is always somebody local parting out a Miata on Craigslist. Since the parts are local, shipping costs are eliminated.
I decided to upgrade the front subframe to the one from the 94-97 Miatas. These cars came equipped with more bracing from the factory on the front and rear subframes. You technically could add these braces to the original subframe of the 90-93 cars but that would require more work on my part. When I started looking for parts, I discovered that a fellow racer had the parts I needed. He cut me an awesome deal at $100 for the front subframe, spindle and lower control arm. I didn't need the upper since I had a spare. I sourced a new wheel from our local race tire supplier and series sponsor - AIM Tire.
So I picked up the parts and started wrenching to get the car ready for the next race. I replaced the subframe and control arms. I didn't replace the spindle at this time because a I couldn't get the ball joint separated so I left it alone since I had replaced the ball joint when I built the car.
Here is a comparison of a bent subframe the straight, un-bent replacement. The bent subframe is on top. The replacement is on the bottom. The control arm mounting tabs were bent a good 1/4".

If you never replaced a front subframe on a Miata, it isn't particularly difficult. It took me the better part of a day to do it 4-6 hours. If you want specifics, please contact me and I can prepare a write-up with pics.
Do you think I got it right? Sadly, no....
Once the car was back together, I brought it over to TFB Performance to get the car corner balanced and aligned. Here is where we discovered that I had not replaced ALL of the bent parts. We couldn't get more than -1.5* of camber on the passenger front. Turns out the spindle and the ball joint were also bent. I never even knew those parts could bend.... Thankfully, TFB does a lot of Miatas and had the parts in stock. He installed a new ball joint and a used spindle. I spent about $700 in total on this repair. Expensive mistake but it could have been worse.
If you are curious about how to diagnose a bent ball joint. Here is a video I took repeating the diagnostic procedure that TFB had done in the shop. Basically, put a socket on the ball joint, put pressure so that the ball joint is pushed downward or outward so that it is against the outer edge that it sits in, then turn the wrench as if you were tightening the nut. Hopefully the video makes sense of this:
Frustrating repair but it got done. When's the next race?
SCCA Spec Miata Race - July @ Thunderhill = Spin and wreck...
This was a frustrating race. Blogging about it made it more frustrating. Hence the radio silence on the blog.
I was having a great weekend. The car felt great. The tires were performing well and I was getting a lot out of them. Pressures were 38 PSI checked after hot practice and qualifying which is perfect. My lap times improved a lot. I was finally doing 2:16s at Thunderhill which ain't bad for a rookie. Then the race started....
Check out the race on YouTube here:
I was chasing fellow rookie Cliff in the white car with the burgundy stripe. I was pushing hard and making him work for his position. Problem was that the tires were starting to lose grip. My mind was telling me that I had to slow it up a bit and let the tires cool off a bit and come back to me. The "Red Mist" was telling me to push harder. Just one more turn. So I kept pushing. And then.... I had no grip at T5... Oops.
I crested the hill and the car was already sliding and eventually looped around. The passenger side front wheel hit the adjoining road surface sideways and damaged the front end of the car. I could have rolled it if the rear wheel had also made contact there but thankfully that didn't happen. I wound up sitting in that spot and waiting for the race to finish so I could get the car back into the pits.
Thankfully I was able to load the car onto the trailer so I could get it home and figure out what I was going to do and how I was going to get this fixed.
This sucked.
Lessons learned = Beware the Red Mist. Believe what your tires are telling you. Loss of control can be expensive.
Sunday, July 10, 2011
Preparation: Weight Loss
I had my car aligned and corner balanced back in January when I finished the build. A bunch of local winning racers that I met at the track when doing my research and on the MazdaRacers.com forum had recommended that I go to TFB. Tim F. Barber has won more races and has so many trophies that his shop is absolutely overflowing. His shop is located at Infineon Raceway. Tim did a great job on my car at the time.
However since that time, I have had about 5 off track excursions (remember the big spin I told you about at Thunderhill...?). After the last Laguna race, I removed the wheels, rotated them and washed the car. While the wheels were off, I noticed that the passenger side tires seemed a bit more worn on the outside than I expected. I didn't think much of it at the time. However, when I drove the car over to TC Design when I had Tony build my exhaust. I noticed that the car didn't feel the same and the steering wheel was slightly turned to the left.
My car is still registered and insured by the way.
Something was obviously wrong and tires are expensive. I am planning on taking the car into TFB so I can have it aligned and corner weighted again. In preparation of taking the car to him, I want to do 2 things:
1. Remove some weight.
2. Install a Cool Suite system.
I had my car weighed at Laguna on the Tech Inspectors scales just to check what it weighed in at. I had half a tank of gas when I weighed the car at TFB the first time. The fuel gauge was on E so I probably only had 2 gallons of gas in the car. I weighed in at 2302 with me in the car. The rules state that minimum weight is 2275 for the 1.6 Miata. Fuel weighs about 6lbs per gallon so I figured I could stand to loose a bit of weight from the car.
TC Design trimmed material from the doors when they did the cage. They trimmed enough to fit the dual NASCAR bars on each side so I had a little bit to loose - or so I thought.
There was a recent discussion on Mazda Racers about removing material from the doors:
http://mazdaracers.com/index.php?showtopic=1040
In that discussion, everyone seemed to think that you needed a plasma cutter or air tools to trim the doors. It sounded a bit over kill when I read that thread. I had a look at my doors and the sheet metal is really thin and flimsy. It seemed like it wouldn't be that hard to trim the doors with the tools that I had available. Remember - I don't have air tools or a welder. I work on my car in my garage with hand tools that I bought I Sears.
I had some time today and decided to try some weight loss techniques on my driver's door while I was doing laundry.
Have a look at this pic here. Note that I already removed a rather heavy part in this pic as you can tell by the gray colored area at the top. I also started cutting out a small triangle of sheet metal in front of the door handle.
 If you look closely, you will notice a series of 1/2" sized holes along the top and bottom of that gray area. That is where I used my power drill and a Uni-bit to drill out the spot welds and pull that part off. Check out the pic below of the part removed and the tools I used:
 Sorry, the Uni-bit is not pictured. Do notice that long white piece of sheet metal. Can you guess how much it weighs?
.
.
.
No?
.
.
That part along weights 2.5 lbs! Frickin amazing how heavy that part is. It is rather thick gauge metal and is butted up against some thinner gauge metal. I was able to remove that using the power drill alone and a screw driver to do a little bit of prying in about 20 minutes.
As you can see in my pic with the tools, there is a bunch of scrap sheet metal, a Dremel and some sheet metal sheers. I put them to use as well removing a bit more of the door metal as you can see in this pic:

Notice the line where I stopped cutting on the top end. There is a reason behind that. That top section is two layer metal spot welded together. It is actually quite strong. The sheet metal used for those two layers is nowhere near as thick as the part that I removed. I left that dual layer area intact and just cut/trimmed the single layer of sheet metal around that section. I don't need to loose a lot of weight so it really wasn't worth the effort to go crazy cutting stuff out. Plus the laundry was done. :)
Oh, by the way, that pile of scrap metal didn't even register on the scales so not much to loose there...
I stopped there for today, cleaned up and got the shop vac out to vacuum out all of the metal shards that the drilling created. If you decide to to this yourself, do wear proper safety equipment. I wore glasses and gloves and put shoes on once the shards of hot metal started sprinkling down over my sandal wearing feet. That stuff is HOT. I also got hit in the face with a decent amount of metal scrap while drilling so do be careful. Some metal in the eye will result in a trip to the emergency room or worse.... I will drill out that top section that weighs 2.5 lbs from the passenger side during the week as I have time.
Regarding the cool suit, I'm going to try and build my own next weekend. They retail for about $300. Judging by some threads floating around the net, I should be able to build my own for about $100. I'll post up about that when/if I'm able to pull it off. The temps at the next race at Thunderhill is expected to be in the 90s and 100s! Gotta keep cool.
However since that time, I have had about 5 off track excursions (remember the big spin I told you about at Thunderhill...?). After the last Laguna race, I removed the wheels, rotated them and washed the car. While the wheels were off, I noticed that the passenger side tires seemed a bit more worn on the outside than I expected. I didn't think much of it at the time. However, when I drove the car over to TC Design when I had Tony build my exhaust. I noticed that the car didn't feel the same and the steering wheel was slightly turned to the left.
My car is still registered and insured by the way.
Something was obviously wrong and tires are expensive. I am planning on taking the car into TFB so I can have it aligned and corner weighted again. In preparation of taking the car to him, I want to do 2 things:
1. Remove some weight.
2. Install a Cool Suite system.
I had my car weighed at Laguna on the Tech Inspectors scales just to check what it weighed in at. I had half a tank of gas when I weighed the car at TFB the first time. The fuel gauge was on E so I probably only had 2 gallons of gas in the car. I weighed in at 2302 with me in the car. The rules state that minimum weight is 2275 for the 1.6 Miata. Fuel weighs about 6lbs per gallon so I figured I could stand to loose a bit of weight from the car.
TC Design trimmed material from the doors when they did the cage. They trimmed enough to fit the dual NASCAR bars on each side so I had a little bit to loose - or so I thought.
There was a recent discussion on Mazda Racers about removing material from the doors:
http://mazdaracers.com/index.php?showtopic=1040
In that discussion, everyone seemed to think that you needed a plasma cutter or air tools to trim the doors. It sounded a bit over kill when I read that thread. I had a look at my doors and the sheet metal is really thin and flimsy. It seemed like it wouldn't be that hard to trim the doors with the tools that I had available. Remember - I don't have air tools or a welder. I work on my car in my garage with hand tools that I bought I Sears.
I had some time today and decided to try some weight loss techniques on my driver's door while I was doing laundry.
Have a look at this pic here. Note that I already removed a rather heavy part in this pic as you can tell by the gray colored area at the top. I also started cutting out a small triangle of sheet metal in front of the door handle.


.
.
.
No?
.
.
That part along weights 2.5 lbs! Frickin amazing how heavy that part is. It is rather thick gauge metal and is butted up against some thinner gauge metal. I was able to remove that using the power drill alone and a screw driver to do a little bit of prying in about 20 minutes.
As you can see in my pic with the tools, there is a bunch of scrap sheet metal, a Dremel and some sheet metal sheers. I put them to use as well removing a bit more of the door metal as you can see in this pic:

Notice the line where I stopped cutting on the top end. There is a reason behind that. That top section is two layer metal spot welded together. It is actually quite strong. The sheet metal used for those two layers is nowhere near as thick as the part that I removed. I left that dual layer area intact and just cut/trimmed the single layer of sheet metal around that section. I don't need to loose a lot of weight so it really wasn't worth the effort to go crazy cutting stuff out. Plus the laundry was done. :)
Oh, by the way, that pile of scrap metal didn't even register on the scales so not much to loose there...
I stopped there for today, cleaned up and got the shop vac out to vacuum out all of the metal shards that the drilling created. If you decide to to this yourself, do wear proper safety equipment. I wore glasses and gloves and put shoes on once the shards of hot metal started sprinkling down over my sandal wearing feet. That stuff is HOT. I also got hit in the face with a decent amount of metal scrap while drilling so do be careful. Some metal in the eye will result in a trip to the emergency room or worse.... I will drill out that top section that weighs 2.5 lbs from the passenger side during the week as I have time.
Regarding the cool suit, I'm going to try and build my own next weekend. They retail for about $300. Judging by some threads floating around the net, I should be able to build my own for about $100. I'll post up about that when/if I'm able to pull it off. The temps at the next race at Thunderhill is expected to be in the 90s and 100s! Gotta keep cool.
Tuesday, July 5, 2011
Preparation - Finally got an exhaust
My car is underprepared. Till now, I spent most of my time and money on safety and reliability parts - and track time - figuring I'd catch up on power later when my skills improved. I haven't even adjusted the timing on the car yet. Mostly b/c I have no idea how and am too busy/lazy to figure it out. :) Exhaust was still the stock exhaust and cat.
Anyway, at the San Francisco region's Spec Miata Festival at Laguna a couple of weeks ago I won an ART tuned Air Flow Meter during the raffle. The car pulled a lot harder up top. It felt very good.
Power corrupts...
In my last race report, I told you that a friend of mine drove my car in ITE at Laguna. I watched from the grandstands and heard just how quiet the car was with the stock exhaust.
I definitely needed to fix that issue too...
After checking out fellow SM racer, Juan Pineda's cool custom exhaust (by Evil Genius Racing) and feeling what the ART tuned Air Flow meter did, I decided I should get an exhaust. I thought about the Springfield Dyno exhaust that many people run. However, the fitment issues some people experienced scared me off. Plus I'd have to take it somewhere to get the rear part welded on anyway.
Another complication with exhaust here in the San Francisco region is Laguna Seca. We have to meet stringent sound levels when we race at that track - approximately 90db. The Springfield Dyno exhaust is much louder than that. Many people have the local race fab shops add a second muffler to the rear of the Springfield Dyno exhaust to make sound.
So I decided to go to TC Design since Tony built my cage, he is nearby and he does awesome, timely work. TC Design builds his exhausts so that you have 2 rear sections:
So I scheduled an appointment. Dropped the car off this morning. Picked it up this afternoon.
My car finally sounds like a race car. Fixed that "problem". Should have more power also.
I'd take a pic but its not easy to do in the garage. The next race video should sound racier!
Anyway, at the San Francisco region's Spec Miata Festival at Laguna a couple of weeks ago I won an ART tuned Air Flow Meter during the raffle. The car pulled a lot harder up top. It felt very good.
Power corrupts...
In my last race report, I told you that a friend of mine drove my car in ITE at Laguna. I watched from the grandstands and heard just how quiet the car was with the stock exhaust.
I definitely needed to fix that issue too...
After checking out fellow SM racer, Juan Pineda's cool custom exhaust (by Evil Genius Racing) and feeling what the ART tuned Air Flow meter did, I decided I should get an exhaust. I thought about the Springfield Dyno exhaust that many people run. However, the fitment issues some people experienced scared me off. Plus I'd have to take it somewhere to get the rear part welded on anyway.
Another complication with exhaust here in the San Francisco region is Laguna Seca. We have to meet stringent sound levels when we race at that track - approximately 90db. The Springfield Dyno exhaust is much louder than that. Many people have the local race fab shops add a second muffler to the rear of the Springfield Dyno exhaust to make sound.
So I decided to go to TC Design since Tony built my cage, he is nearby and he does awesome, timely work. TC Design builds his exhausts so that you have 2 rear sections:
- A straight pipe that exits straight out the driver rear.
- Piping and a performance muffler that exits at the stock location on the Miata.
So I scheduled an appointment. Dropped the car off this morning. Picked it up this afternoon.
My car finally sounds like a race car. Fixed that "problem". Should have more power also.
I'd take a pic but its not easy to do in the garage. The next race video should sound racier!
Monday, July 4, 2011
Catching up on the 2 Laguna Seca races - June 16-19 - Carnage
Laguna Seca race #2 - June 16-19 - Spec Miata Festival
I came into this race feeling so confident. I knew the track better now. I could trust the car. And I had added the Grassroots Motorsports stickers. ;-)
The June event was a 4 day Double Regional event - which means 2 races instead of one. Testing was on Thursday. Practice and Qualifying was on Friday. Saturday included one race and another qualifying event for Sunday's race. In addition to all this, it was a Spec Miata Festival so we had an extra race on Sunday at the end of the day! Very cool.
As part of the Spec Miata Festival, there were some extra special activities. Friday night was a Spec Miata BBQ and raffle and we took a group picture at the corkscrew. Its amazing how many Miatas you can fit on track 4 wide for a picture! I gotta find that pic somewhere. It was pretty cool.
Anyway, the BBQ and raffle was awesome. Everybody brought something or multiple somethings and Mazda was giving away $2,000 worth of credit for parts at Mazda Motorsports. I brought some stuff to give away and won 2 cool things. I won an ART tuned air flow meter offered up by a fellow SM racer that switched to Sealed Spec Miata, which was awesome, and a set of front brake pads from M&L Racing, doubly awesome! There were a lot of cool stuff being offered up. Lots of generosity from a lot of the local shops and fellow racers.
'Nuff of that. Lets talk racing. :)
I did not attend the Test day on Thursday but it was eventful. Apparently every test session ended with a black flag. Lots of carnage and wrecked cars. Fellow rookie Terrie G rolled his recently purchased flat black Spec Miata. It did 2 barrel roles at the exit of turn 4 and came to a rest on its roof. Terry did not enjoy retelling the story to us but he did. The roll cage and safety equipment did their job. Larry Oka and his crew came through and made the car driveable and a windshield installer came to the track to replace the windshield. Amazingly enough, he drove and raced the car all weekend! The workers gave him the "Hard Charger of the weekend" award for his efforts!
Friday went normally. I was pitted with my friend John D who has been racing SM for a few years and has been a great help to me. Gary P was also pitted with us. I asked John for info on tire temps before going out so the car felt grippy. It was pushing a bit at turn 2 and 11 still but I did what I could to get around it.
Saturday and Sunday went normally too. My times overall were faster by 3-5 seconds or so compared to the prior race. Although the video shows me getting passed more part of that was from front runners who had gone off and were making their way through the pack again. There were about 70 Miatas entered for the race. It was a big field! I drove cleanly. Others did not and you could see the body damage during the race.
The big exciting parts of Saturday and Sunday include 3 particular events:
1. Double Stinting
First, my friend and fellow RX7 nut, Guy, broke his car. He is racing a yellow 93 RX7 in ITE. His oil cooler exploded. He asked to borrow my car for Sunday's qualifying and race so he could earn points and retain his lead in the championship. I agreed.
It was weird having someone else drive my car but interesting to watch. He kept it clean and I could tell he wasn't pushing too hard. Just driving fast enough to earn points. The odd part of the whole thing was that the car was now being used in 2 classes with little down time in between. I wasn't sure what to do about tire pressures as a result. I went out w/o changing pressures and the tires got too hot and lost grip as a result. The second time around, he set the pressures for me while I suited up.
Lesson Learned: Tire Pressures when hot
I had no idea what to do about tire pressures when the the car was still hot and fresh off the track. Apparently what you should do is set them to what you would have set them if the tires were cooler since they will increase by about the same amount the next time out. Makes sense in retrospect.
2. Crashing and body damage repair
My fellow rookie racer Cliff and Gary P got into each other about 100 feet before the checked flag on Saturday. Apparently Gary got loose and potentially lost control at the exit of turn 11. Cliff was trying to get around him and their cars collided. Cliff was sent into the inside wall damaging the driver side fender and scuffing up the front bumper. His passenger side door and fender were also damaged from the collision with Gary. Gary's car was also damaged in the driver side rear corner. I broke out my BFH and crow bar and Cliff and Austin got it driveable again. Thankfully it was just body damage and the car was ready to race. Neither driver was injured.
3. Crashing and suspension damage
My fellow rookie racer Brandon driving the Sharpie car took a light hit in the passenger side rear wheel by another rookie competitor who spun and hit him. I didn't know about it until we were starting to get ready to go to dinner. His car was jacked up and he was changing to his street tires since he doesn't trailer his car. He told me what happened and I popped my head under the fender to take a look.
I had read that when a Miata gets hit in the wheel, the long rear bolt that attaches the spindle to the rear lower control arm bends. So I quickly looked at the bolt and saw it was bent. Oh boy....
So I got my BFH and the crow bar from Cliff and we set to work. A fellow racer had a "Drift Pin" which we used to bang the bolt out and had a spare bolt that he sold him. We spent an hour pounding that bolt out. Everybody took a turn hammering. It was kinda tiring. I need to get one of those tools and add it to my collection of things to bring to the track.
Anyway, we got the bolt out and Brandon drove the Sharpie car to dinner. Alignment didn't feel great. He got it aligned the next morning and discovered that he had bent the subframe as well. Looks like we'll need to fix that too. He is mildly annoyed at the situation but...
Lesson Learned: Consider changing your setup instead of driving around issues
Now, remember the "pushing" or understeer I mentioned in turn 2 and turn 11? If I had given it some more thought, I could have raised the front or rear of the car 1/2 a turn on the coilovers to try and dial that out. I lost a lot of speed on both of those turns, partially b/c of this handling issue that I was driving around instead of adjusting my setup to address it. I'll remember that next time. My car has been corner balanced and aligned by a TFB - a top level race setup shop based out of Infineon Raceway.
So that is the scoop. Lots of lessons learned that should help me for the next race at Thunderhill. As a rookie you learn a lot and the key to getting faster is seat time and understanding the mistakes you are making so you can try not to repeat them.
Catching up on the 2 Laguna Seca races - Memorial Day Race
I haven't had much time to post lately so my apologies. We had 2 races at Laguna Seca within 3 weeks of each other. Balancing a challenging job, family and prepping for the next race apparently was more time consuming than I expected. Prior to these 2 races, we have been on average once a month schedule. Once a month is easier to manage at this stage of my life. More than once a month, while totally enjoyable, takes more time and effort than I have available. The cost of 2 events on the same month is also a challenge but I'll leave that topic for a different post. :)
Memorial Day race @ Laguna Seca
Recapping the Memorial Day race at Laguna Seca - It was a total blast as expected.
Preparation - I had only been to Laguna Seca once before in my street car (1993 RX7) so I really don't know the track very well. I had tried to prep by watching video to learn the line. Watching video is an OK prep but the reality is that video doesn't do the track justice. There is a lot of elevation changes which affect your braking points and how much speed you want to try and carry through the turns.
Coaching - As part of SCCA membership, you have access to the Racing Driver's Club. This is essentially a mentoring program where they pair you up with a more experienced racer that you can ask questions to and they can give you input and coaching. It is free to rookie drivers in the first season like me. :) I spoke with my coach throughout the weekend and got great tips each time.
The car was reliable as expected. Gotta love Miatas. :)
So my first time out for practice session at Laguna, I felt lost out there. I was supposed to go out with my mentor and do some lead follow exercises but I was late getting to grid and he had left already. So I went out on track and realized just how lacking video was as preparation. I slowly gained some confidence with the corners, identifying braking points, turn in points and exit points.
This first practice session, I also struggled with tires that just did not feel like they were gripping. If you have read one of my first posts about SCCA Driver's School, you would realize that I had this problem before... The ambient temps on track were pretty cold that first morning and either I didn't start out with correct tire pressures or I was driving hard enough to get the tires up to temp and pressure. Probably both. Toyo RA1 like to be run in the 38-40lbs range depending on shave.
Lesson Learned: Tire Pressures, Tire Pressures, Tire Pressures!
It really is amazing just how important tire temps are. It would have been helpful to have known what temps to start the tires out that morning but I had never been to the track and didn't have any setup notes and didn't think to ask my fellow racers for advice.
Anyway, I figured out the temp issue after the session when I checked my tire temps. They ranged from 36.5 - 37.5 all around. It didn't help my confidence though. I was not feeling particularly confident about myself after this practice session. Confidence is important - both in the car and in your own abilities.
Qualifying - I checked and adjusted tire pressures (adding 1.5 or so to some tires) before the next time out which was a qualifying event. That one went much better. The ambient temps had increased tires felt like grippy and the car felt good again. It did push in turn 2 at the end of the main straight and also in turn 11 coming onto the main straight but I did what I could to drive around this - more on this later in this post...
I don't remember exactly where I qualified but it was toward the back and around my fellow class of 2011 racers. You can see the action in the video I posted. Regardless of what the video shows, I loved every second of it. :) I got a slight tap on turn 11 toward the end of the race when the P1 and P2 drivers caught up with me but no big deal.
The one thing that surprised me was how much quicker the leaders caught up and lapped the back of the pack at Laguna Seca. In retrospect, it shouldn't have been a surprise really since Laguna Seca is a much shorter track than Thunderhill but I'm a rookie so it was... At Thunderhill, I can get to the last lap of the race w/o being lapped. At Laguna, b/c it is a shorter track, the leaders start making their way through at the mid point of the race. I spent a lot more time driving my mirrors and that caused some mistakes on my end. I'm still compromising my race so that I can let the race leaders through w/o incident.
Lesson Learned: The importance of Race Craft
I learned another big lesson this weekend. Race craft is very important. Although I don't have video of Saturday, I was stuck behind a slower driver with a faster car. He was renting a well prepared car with a "pro" motor. The car had a ton of power on me. I could pass him on certain turns but he would just put the throttle down and motor on by me like I was standing still. I'm basically running a low mileage (90k) motor from a 91 Miata. I'm still running the stock exhaust and cat for that matter also. I'm very unprepared compared to other cars.
You can probably see myself and my fellow rookie racers in the Yellow/Orange Larry Oka rental car driven by Austin and the Sharpie car owned by my buddy Brandon. Austin was able to force the green car with the Union Jack hardtop into a mistake on turn 11 and the three of us barely managed to get through. You can see how strong the motor in that car is by the fact that he was able to pace us all the way down the straight even though we passed him at turn 11. Simply amazing.
I need to start learning Race Craft and how set people up for a pass. I guess that's progress. :)
All in all, we had a great time racing and everybody went home with cars in one piece - which is more than we can say about the next race.... Read on....
Tuesday, June 21, 2011
SCCA Spec Miata Festival race video - Mazda Raceway Laguna Seca
Just finished uploading my video of Sunday's race (June 19, 2011).
Link:
SCCA Spec Miata Festival race at Mazda Raceway Laguna Seca
I will make a further post tomorrow. I have another video from Saturday that I'm trying to edit and post.
Happy viewing!
Link:
SCCA Spec Miata Festival race at Mazda Raceway Laguna Seca
I will make a further post tomorrow. I have another video from Saturday that I'm trying to edit and post.
Happy viewing!
Wednesday, June 15, 2011
Grassroots Motorsports stickers are on! Let the winning begin!
What's a race car w/o stickers?
Better question - What's a race car w/o Grassroots Motorsports sticker?!
The car is now equipped to win.
Mazda stickers? Check.
Mazdaspeed sticker? Check.
Toyo Tires stickers? Check.
Thunderhill and Sunoco money stickers? Double check.
SCCA, class and number stickers? Check.
My poor race car had been lacking Grassroots Motorsports stickers. Crying shame it was... Worse yet, my subscription had run out when my NASA membership lapsed. I fixed that issue this last week renewing my subscription and ordering GRM stickers and a GRM hat.
Grassroots Motorsports is the best racing magazine for us grassroots, DIY guys and girls racing on a budget. Lots of good, useful articles. Tons of great advertisers. The Grassroots Motorsports forum/discussion board is also a fun, laid back place to talk about the racing and car addiction with like minded people. Plenty of Miata fans and racers. Etc etc.
Sadly, the hat doesn't fit. I ordered a size Medium hat since I wear a medium helmet. Going to have to order a large. This weekend is the San Francisco region SCCA's Spec Miata Festiva. There is going to be a raffle, BBQ, double races for Spec Miatas. I am going to offer up the hat as a raffle prize so someone else's head will be racier.
Anyway, pics of the GRM stickers. Can you spot them? :-)


You can get your GRM swag here: http://grassrootsmotorsports.com/store/
Monday, June 13, 2011
Video systems - Go Pro Hero or Contour or camcorder for video?
So, there was a long delay between my last race at Thunderhill in March and the last race at Laguna Seca. This gave my budget some time to recover. I have been pondering what to do about video for a while. I had a few budget friendly options:
http://forums.bimmerforums.com/forum/showthread.php?t=1036795&highlight=aiptek
I actually bought the camera for free using my credit card points last year. I was seriously considering this option but it required some mods and hacks in order to work properly in a race car environment. I just didn't feel like investing the time and energy into it. I will probably sell it off on craigslist or ebay soon.
So the choice for me was between the Go Pro and the Contour. Decisions, decisions....
I googled around for a while looking for reviews on both. There is plenty of info out there and lots of people have opinions. Opinions are like body parts. People usually have at least one and some of them stink. So I took what I read with a grain of salt. I wound up ordering both from Amazon.com using some of my credit card points accumulated during the build. I wanted to see and feel them both so that I could make a better informed decision. I figured I'd return which ever one that I didn't want.
I'll skip you the boring details but they both basically do the same thing. The video quality when viewed on YouTube or Vimeo is basically the same. Both have decent microphones. Both are small. Both are about the same price.
Two things I liked about the Contour over the Hero:
The Go Pro doesn't come with video editing software and you can configure it using the built-in menu which is a nice plus. The Contour requires you to have your laptop handy to run the Storyteller software to configure the camera. Thankfully, you shouldn't have to configure the camera often once you get the imaging and contrast set properly. Oh, there is no instructions anywhere on how to configure it so just guess at what works....
Lesson Learned
Now there is a lesson in this long rant. Be aware of your vendor options and buy from a place that will give you support if you need it. Pricing being similar, the support of someone who can save you time and has already learned the lessons is very valuable.
I discovered that fellow Spec Miata racer Juan Pineda of Art of Road Racing fame is a Contour dealer. If you wish to buy a Contour and want someone to tell you what you need to do to get it working w/o fussing around on support forums and such, I'd recommend getting it from Juan. Here is a link: Contour GPS - Motorsports vendor and support.
I'm still trying to figure out what to use for video editing on a Windows laptop. I'll think about it after the next race at Laguna. :)
- Cheap Camcorder setup
- Go Pro Hero
- Contour
http://forums.bimmerforums.com/forum/showthread.php?t=1036795&highlight=aiptek
I actually bought the camera for free using my credit card points last year. I was seriously considering this option but it required some mods and hacks in order to work properly in a race car environment. I just didn't feel like investing the time and energy into it. I will probably sell it off on craigslist or ebay soon.
So the choice for me was between the Go Pro and the Contour. Decisions, decisions....
I googled around for a while looking for reviews on both. There is plenty of info out there and lots of people have opinions. Opinions are like body parts. People usually have at least one and some of them stink. So I took what I read with a grain of salt. I wound up ordering both from Amazon.com using some of my credit card points accumulated during the build. I wanted to see and feel them both so that I could make a better informed decision. I figured I'd return which ever one that I didn't want.
I'll skip you the boring details but they both basically do the same thing. The video quality when viewed on YouTube or Vimeo is basically the same. Both have decent microphones. Both are small. Both are about the same price.
Two things I liked about the Contour over the Hero:
- I liked the fact that the Contour had laser sights which can be used to aim the camera w/o much fuss. You basically press the button and the lasers shine out through the windshield making it super easy to adjust. I got it positioned perfectly the first time.
- The power switch on the Contour was also a little easier to use than the Hero with my gloved hand. The Contour is a large sliding switch that you basically push forward and back to power on/off. The Hero's power button is a bit smaller and takes a bit more dexterity to use but still doable.
The Go Pro doesn't come with video editing software and you can configure it using the built-in menu which is a nice plus. The Contour requires you to have your laptop handy to run the Storyteller software to configure the camera. Thankfully, you shouldn't have to configure the camera often once you get the imaging and contrast set properly. Oh, there is no instructions anywhere on how to configure it so just guess at what works....
Lesson Learned
Now there is a lesson in this long rant. Be aware of your vendor options and buy from a place that will give you support if you need it. Pricing being similar, the support of someone who can save you time and has already learned the lessons is very valuable.
I discovered that fellow Spec Miata racer Juan Pineda of Art of Road Racing fame is a Contour dealer. If you wish to buy a Contour and want someone to tell you what you need to do to get it working w/o fussing around on support forums and such, I'd recommend getting it from Juan. Here is a link: Contour GPS - Motorsports vendor and support.
I'm still trying to figure out what to use for video editing on a Windows laptop. I'll think about it after the next race at Laguna. :)
Wednesday, June 1, 2011
Racing Video from Mazda Raceway Laguna Seca - Memorial Day 2011
I'm still wiped out from the weekend but here is a link to my racing video on YouTube. This is my first time running video. I bought a Contour GPS camera and mounted it a few days before the race.
You may want to skip ahead to the 10 minute mark where the race starts. I'm still learning about video and need to get some editing software.
Enjoy!
Spec Miata Laguna Seca Memorial Day 2011
You may want to skip ahead to the 10 minute mark where the race starts. I'm still learning about video and need to get some editing software.
Enjoy!
Spec Miata Laguna Seca Memorial Day 2011
Sunday, May 22, 2011
Stripes, graphics, vinyl - aka trying to make it look like a race car
File this project under the category of "more work than I ever anticipated"...
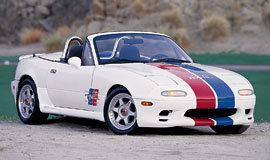
For whatever reason, I like white race cars. Makes it real easy to see sponsor logos (why I care about that on my unsponsored car I have no idea...) and to see if you have any oil leaks or other maladies. My car is white as you can tell from the pic. I'm also a big fan of blue and red stripes on white cars. Like the Racing Beat Miata and the Brumos Porsches. So I figured I'd add some red and blue stripes and be semi patriotic for the next race - Memorial Day weekend at Laguna Seca. Laguna Seca baby! Like the Vegas for car guys. This is what the Racing Beat Miata looks like.
I wanted to do something similar to my car.
"It's just some stickers. Should take me 15 minutes to do this." is what I was thinking Saturday morning while hanging out at the pool with the wife. So once I got bored sitting around, I went to TAP Plastics to see if they had any vinyl since they seem to have lots of other big boy toys.
I bought a few feet of blue and red vinyl sheet and came home thinking I'd install it on Sunday while the wife was working. The local Bay Area Miata Driver's club had done a write up on installing vinyl stripes on a Miata. How hard could it be? Yeah, right...
I managed to cut the stripes in the pattern I wanted without too much issue. Then I tried to peel and stick. That is when the annoying part started... I got many many air bubbles when I tried to stick the stripes to the hood. I pulled and re-attached the vinyl a few times and screwed up the vinyl a bit. After spending more time popping the bubbles trying to make it look less amateurish, I gave up and stopped at the hood. I was going to stripe the top and the trunk but I'm out of time. Good enough for a home built Spec Miata. :)
I also spent some time putting on the Toyo Tires stickers and AIM Tire stickers. AIM had given me a great deal and great service on Team Dynamic wheels and Toyo RA1 tires shaved to 6/32" so I'll happily run their stickers on my car. They also provide track side service so its good to support a local company.
Anyway, some before/after pics for your viewing pleasure.
Before:

After:

Check out my custom touches on the Toyo Tires sticker. I cut each letter individually and placed it on the wheel well so it followed the contour. Pretty cool I think. :)

Now I just need to get my Race Technology DL1 lap timer / data acquisition system working. I bought it used and am still trying to figure it out....
Sunday, May 15, 2011
How to install an AMB Transponder in a Miata (1.6L)
So, my friend John D hasn't had any luck with transponder wiring and needed to rewire his so I figured I'd write up a post of how I installed mine. Some people just hard wire it to the battery so the transponder always has power. This is probably OK as the transponder does not draw much electricity but I'd prefer to have it wired to switched power so it only comes on when the key is on and the car is running.
So here it is.
I installed mine at the front of the car, under the driver side fender, in front of the wheel along the frame rail. I like this location b/c there is a hole right there to feed the wiring through to one of the air bag wires that uses switched power.
I used two self tapping sheet metal screws to mount the transponder to the car. Seen here:
 View from a lower angle:

The wiring winds up coming through under the driver side headlight. Here is a pic of the wiring from the engine bay. It is the curled up black wiring in case you it's not clear...

Here is a pic of the wire I used to get switched power. If you haven't modified the air bag wiring, it will probably have a blue connector plug on it. I cut mine off and wired it directly.

There you have it. Easy peazy and reliable.
John's former mechanic had wired it to the wiper motor so it only worked when the wipers were on. He had one of the race prep shops fix it at the track when he found out it didn't work. The 2nd shop charged him $125. Later he discovered that they had wired it to his crank angle sensor when the attachment failed and caused the engine to cut out after 6000 RPM. My way is better than either of these professional mechanics....
Hope someone finds that helpful. Let me know if you need further detail on those pics.
So here it is.
I installed mine at the front of the car, under the driver side fender, in front of the wheel along the frame rail. I like this location b/c there is a hole right there to feed the wiring through to one of the air bag wires that uses switched power.
I used two self tapping sheet metal screws to mount the transponder to the car. Seen here:


The wiring winds up coming through under the driver side headlight. Here is a pic of the wiring from the engine bay. It is the curled up black wiring in case you it's not clear...

Here is a pic of the wire I used to get switched power. If you haven't modified the air bag wiring, it will probably have a blue connector plug on it. I cut mine off and wired it directly.

There you have it. Easy peazy and reliable.
John's former mechanic had wired it to the wiper motor so it only worked when the wipers were on. He had one of the race prep shops fix it at the track when he found out it didn't work. The 2nd shop charged him $125. Later he discovered that they had wired it to his crank angle sensor when the attachment failed and caused the engine to cut out after 6000 RPM. My way is better than either of these professional mechanics....
Hope someone finds that helpful. Let me know if you need further detail on those pics.
Subscribe to:
Posts (Atom)